Hello Everyone!
Merry Christmas!!!!!

What????
It's not Christmas yet???
Well, apparently for crafters it is time to get their Christmas gifts and store items started!!! So in that spirit, I decided to try my very first "quilt along". What's a "quilt along" you ask? This is when everyone follows a posted pattern and tutorial on the internet and makes an item/clothing piece/quilt etc at the same time and posts pictures along the way. This particular quilt along was organized by Charlie of Qubee Quilts. He even included Christmas recipes (yummy) and raffles for prizes! (course I won nothing but thats not the point..lol) Now, you were supposed to be able to complete the quilt in a day but it took me three days, due to distractions and how slow I sew. But I am pleased with the results!!! I am going to include some pics along the way and my finished project: A Christmas Quilt (36" square)..... perfect for a wall hanging!
First I chose the Moda fabric line called Ready Set Snow and I "picked" it up (read...ordered online) from the Fat Quarter shop...my personal favorite!

Since I was using a different color scheme than what was posted, I used sticky notes and labeled all of my fabric so I didn't get confused. Then I picked out my charms (small squares) which would be featured in the circles.


Next I began making my circles. The method described in the quilt along used wax paper and it didn't work for me so I had to redo my first circle using my own method. I am going to do a tutorial on that (see below). Feel free to try my method if it works better for you!!!
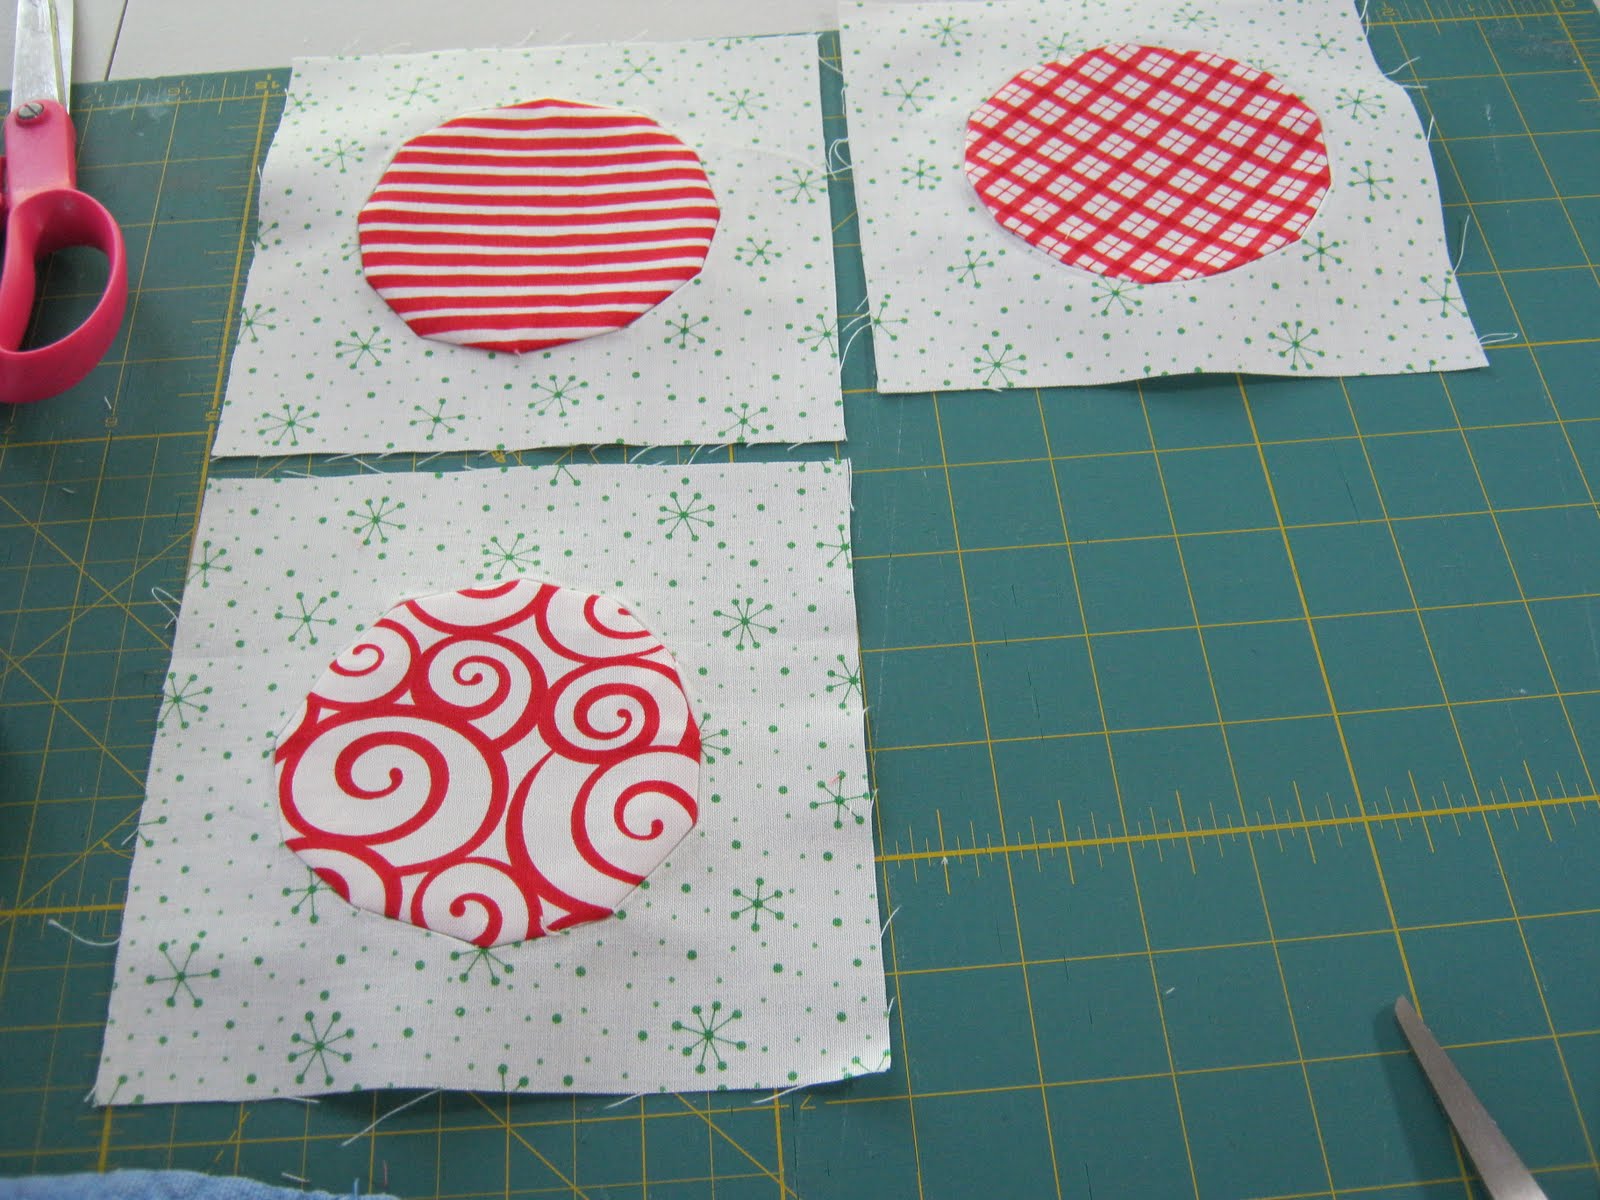
The circles take a while to do...or at least for me....but they are not hard. Here are my first three done:

I finished the circles (on day 2 I think?) then I had to decide where they were going to go and which circles would be bordered in red, and which would be bordered in blue. (see pic above). Then I began adding the borders:

Once the borders around the circles were completed I laid them out in order:

Now, it's this next step that adds some real pizzaz in my opinion! You add triangles to half the squares and it makes it look like a diagonal strip is running through the quilt. I love it! Here it is with the green triangles added to the blue squares. Isn't it cool?????

Of course the next step was to actually sew all these blocks together. Above they are just placed on the floor next to each other!


Yaaa, the quilt top is finished!! Next step is actually turn it into a quilt. For this I laid my backing piece out on the floor right side down. Because this quilt was so small, I just used a 1 yard piece of fabric...fabulous! No pieces or anything! Then I laid the batting on top. I taped these two layers to the floor so they wouldn't pucker or wrinkle. Then I laid the quilt top on top and pinned basted the whole thing.


Then I came to a screeching halt cause I had to figure out how I was going to quilt it. The sample quilt had beautiful diagonal lines made straight using chalk or something. I didn't have that. So after sleeping on it, I decided to stitch-in-the-ditch and make a grid pattern then stipple in the cream background around the circles. This would make the circles "pop". So that's what I did next:


Since it was relatively small, it didn't take too long to quilt. As you can see it was dark out by the time I finished!
On day three I was going to complete this darn quilt!!!!!! So......
The final step was to bind the edges. I trimmed the edges of the quilt sandwich even. I then had to create my own binding. I had a yard of fabric and cut it into two inch wide by the length-of-fabric" lengths. I joined the lengths on an angle like bias tape, which made a super long strip!!!!! Then I readied my iron. I folded the binding in half lengthwise and steam pressed the whole thing. Then I unfolded it and took the raw edges and folded them into the center fold. I pressed the whole thing. Then I folded it in the center with both raw edges folded in (like bias tape) and steam pressed the whole thing. This made the binding 1/2" wide!
Next, I sandwiched the edge of the quilt into the binding and used a wavy stitch to attach the whole thing. ( It is with much glee I can report I have yet to hand stitch any binding!!) I always cheat and do it this way.


Can you see the wavy stitch?

And then my project was complete!
A cute Christmas Quilt!
Yaa! I took some final pics of course:


And there you have it!
Thanks for reading along!!!!
God Bless and Merry Christmas to all,
Cathy***************************************************************************
As I mentioned above, I came up with an alternative way of making the circles and took a bunch of pics of all of the steps. This is definitely the most time consuming part of the quilt because it has so many steps.....however, with that said, none of the steps are hard at all and you can really make great circles. Also, I should add....there is a more traditional way of doing circles but I have no idea what that is...hahahaha!
OK so are you ready????? Here we go!
1. Gather your supplies. I have a circle stencil or you could use a compass or any round object....a roll of masking tape would work too! The point is, you need a smaller circle and a larger circle that is about an inch larger than the smaller one! The cream fabric will become the background and the red charm will be the featured fabric in the circle.

 2. Turn your background fabric with the wrong side up and find the center. (In this case the cream background fabric was about 6" square.) I used a pencil and made a little dot. You don't have to be perfectly centered however. The 6" square will eventually be trimmed square!
 3. I used the 3" and 4" circles and traced them onto the back of the fabric using a pencil. I centered the circle onto the fabric using the dot I made.
 The top half...
 The bottom half....
 Here are the completed circles:
 4. Next I began making a bunch of lines between the inner and outer circle, using my pencil.

 5. Next, I cut out the inner circle
 6. And then I cut tabs by cutting along the lines I drew without cutting into the outer circle. Take your time here!
 7. Next I place the fabric, still right side down, on an ironing board and folded back the tabs to the wrong side of the fabric and ironed them down.

 Use lots of pressure and steam...see a perfect circle!
 I also flipped it over to the right side and gave it another good pressing and steaming!!!
 8. Now this is the fun part! Place your circle with the wrong side up. Use a glue stick and add glue to the tabs. Use plenty!

 9. Now center your smaller charm (right side down) on top of the circle of tabs. Slowly go around the circle and pull the tabs flat and press the charm down to the tab

 10. Flip it over to the right side and make sure you are happy with your circle. Here I noticed at the top right (1 Oclock position) that one of my tabs wasn't pulled to the back properly so I redid that spot.
 I repressed everything (with my fingers and iron) and made sure the tabs were attached to the charm. I let it dry for a minute or two.
 11. When I flipped it over to the wrong side, I checked to make sure the tabs were glued to the charm (red) and not sticking to the cream fabric. You can see I actually lifted it up all the way around.
 12. Now I got ready to stitch the two together. I positioned it so that the wrong side of the charm (red) was facing down and the tabs could be seen glued to the right side of the charm.
 13. You are going to stitch close to the right side of the fold of the tab. Do not cross over the fold..its better to veer away from the fold than into it. Back stitch at the beginning and end to secure.
 I pulled back the cream fabric to keep it out of the way of the stitching and so I could see the fold.
 Here is a good pic of the stitching to the right of the fold....
 14. Remove fabric and cut threads. Now it just needs pressing and a little trim!
 15. Trim the excess fabric....mostly the corners so that there is a seam allowance of about a 1/2".
 16. I pressed the right and wrong side of the fabric quickly just to set the stitches flat and see what I am working with.

 17. Now this is the final step and the one that makes it look like a hand-turned applique! Using the iron, I folded the tabs onto the circle. Slowly go around and press each one in and then really steam press the whole thing to set it.


 Whalaa!!! All finished...here's the front:
 Hope this helps you make perfect circles!!!
Enjoy the rest of your day!
~Cathy
1. Gather your supplies. I have a circle stencil or you could use a compass or any round object....a roll of masking tape would work too! The point is, you need a smaller circle and a larger circle that is about an inch larger than the smaller one! The cream fabric will become the background and the red charm will be the featured fabric in the circle.


Enjoy the rest of your day!
~Cathy
Your quilt looks great.
ReplyDeleteFunnily enough I adapted the circle method too, and found a way that I could then get decent circles more easily, and my way is similar to yours but different!